Remapping paths at render time!


New with Arnold 6.0.4 is path mapping.

All you have to do is create a json file that looks something like this:

{
         "windows": { "S:/": "\\server\projects\" },
         "mac": { "S:/": "/Volumes/projects/"},
         "linux": {"S:/": "/mnt/projects/"}
}

and then set ARNOLD_PATHMAP to point to the json path mapping file

How Arnold handles paths

When you render a frame, here’s what Arnold does for file paths:

  1. Replace backslashes

    When Arnold loads an ass file, Arnold replaces all backslashes ( \ ) with forward slashes ( / )

  2. Expand environment variables

    When Arnold uses a parameter, Arnold expands all environment variable references, which look like this: [MY_TEXTURE_PATH]

  3. Map paths

    After Arnold expands environment variables, Arnold applies the path-mapping rules specified by the Arnold pathmap file.

Arnold expands environment variable expansion and maps paths for:

  • search paths in the options node
  • filename parameters for these nodes:
    • alembic
    • color_manager
    • all driver nodes such as driver_deepexr, driver_exr, driver_jpg, driver_png, and driver_tiff
    • image
    • include_graph
    • materialx
    • photometric_light
    • procedural
    • volume
    • volume_implicit

Setting up path mapping

You can automatically remap paths at render time using a pathmap file.

To use a pathmap

  • Set the ARNOLD_PATHMAP environment variable to point a pathmap file

The pathmap file is a json file. For example:

{
         "windows": { "S:/": "\\server\projects\" },
         "mac": { "S:/": "/Volumes/projects/"},
         "linux": {"S:/": "/mnt/projects/"}
}

Path mapping uses regular expressions. The general format of an entry is this:

{
         "windows": { "regular expression": "replacement string" },
}

For example, this pathmap replaces all drive mappings like E:/ and S:/ with //SERVER/

{
         "windows": { "[A-Z]:/": "//SERVER/" },
}

Arnold converts backslashes ( \ ) to forward slashes ( / ) when it loads the ASS file.

Path mapping happens after that, so pathmaps never have to deal with backslashes.

There can be multiple mappings for each OS:

{
         "windows": { "[A-Z]:": "//SERVER", "sourceimages/": "textures/"},
}

[mtoa] Arnold batch rendering flags


MtoA defines a lot of batch render flags for Arnold. For example, here’s how to set the Arnold log verbosity and enable file logging:

render -s 2 -e 2 ^
-r arnold ^
-ai:lve 2 ^
-ai:ltf true ^
-ai:lfn C:/Users/blairs/Downloads/render.log ^
D:\Projects\maya\Support\scenes\example.ma

First,  to use the Arnold batch render flags, you need to use the Maya -r flag to specify that the renderer is arnold (otherwise, you’ll get an “Invalid flag” error).

Then you can use the Arnold batch render flags:

  • ai:lve sets the log verbosity level
  • ai:ltf enables file logging (Log To File)
  • ai:lfn is the log file name. I used forward slashes; I could also have used backslashes and put quotation marks around the log file name.

[mtoa] Using dirmap to update paths


How can you update the paths used to load textures, standins, or volumes? Use dirmap.

You can use dirmap to update the paths for the following nodes:

  • aiImage (Image Name)
  • aiStandin (Path)
  • aiVolume (Filename)
  • MayaFile (Image Name)

For example, if I have a scene file that uses Linux paths like /server/assets/textures/noicon.tx, I can do this:

dirmap -en true;
dirmap -m "/server/assets" "D:/Assets/";

After I run that, when I load a scene Maya will replace “/server/assets” with “D:/Assets” in all file paths.

You can test your directory mapping (dirmap) like this:

dirmap -cd "/server/assets/textures/noicon.tx";
// Result: D:/Assets/textures/noicon.tx //

So:

  • Enable dirmap with dirmap -en, and then create a directory mapping with dirmap -m
  • Load a scene and the dirmap is applied.

TIP For batch rendering, you can use a pre-render script to apply dirmap.

BONUS TIP: dirmap does not update a path if the path is valid. dirmap replaces paths that cannot be resolved.

Setting up Arnold render nodes


I’ve seen several variations of this question recently. Usually there’s some confusion about “Arnold standalone” and what’s actually required on a render node.

If you rendering scene files from Maya, or 3ds Max, or some other 3d application, then you do not need Arnold standalone.

You need the 3d application (Maya, 3ds Max) and the Arnold plugin for that application (MtoA, MAXtoA). Download the Arnold plugin from https://www.arnoldrenderer.com/arnold/download

For example, let’s suppose you want to render Maya scene files.

  • You need to install Maya and MtoA on each render node.
  • You don’t need Maya licenses for batch rendering, and you don’t need Maya licenses to install Maya on render nodes.
  • You need Arnold licenses, which are a separate purchase. MtoA is free and unlicensed. Arnold, however, does require a license to render without the watermark. You need one Arnold license for each render node (for you CINEMA 4D users, a TeamRender client is an Arnold render node and requires its own license).
  • You need an Autodesk network license server running somewhere (not on a render node).
  • You need to connect Arnold to the Autodesk network license manager.

It’s the same thing for 3ds Max and MAXtoA.

[Arnold] Tips for reducing noise when rendering interior scenes with indirect lighting


Indirect lighting of interior scenes can be a challenge, but there are some things you can do. In this post, we’ll give you some quick tips, but you can find more detailed information on support.solidangle.com, both for interior lighting and for troubleshooting noise.

Avoid the Skydome and use a Sky background and Quad lights

Instead of using a Skydome light, use a Sky for the background and quad lights for the light coming in through the windows. The quad lights should just barely cover the entire window.

If there’s anything visible outside the window, you may want to put a spot light on them. Just be careful not to let the spot light go into the room.

Use a distant light to simulate beams of light coming into the room

A distant_light is an easy-to-use option that perfectly matches sun light.

Spot lights don’t produce realistic sun beams since the beams look like they’re expanding, which sun beams don’t do. Moving the spot light further back, and also making sure it’s no larger than it needs to be to illuminate the window, will reduce noise and make it look more realistic.

Don’t put lights too close to the windows

If a light is too close to the window, that means the light hitting the window area is significantly more concentrated and so much brighter than the light hitting the far side of the room and so this produces more noticeable noise.

Make sure your materials are physically based

For example, don’t shade the room Standard shaders with a Diffuse weight of 1, and Diffuse color full white (1 1 1). I don’t think there’s any material known to man that is this reflective. Lowering the Diffuse weight to 0.7 will roughly match white paint and it will also get rid of noise. If it’s too dark, then try increasing the intensity of the lights, increase the number of diffuse bounces, or increase the camera’s exposure.

For a richer look, avoid fake lights inside the room

Consider getting rid of any fake lights you may have inside the room, and instead increase the number of diffuse and glossy bounces in order to get an even more realistic look, not to mention make the lighting easier. Doing that does increase render times, unfortunately, but does give a richer look.

hat tip: Thiago

Getting an Arnold log from Royal Render


I’ve had a few cases where people weren’t sure how to get the Arnold log from Royal Render. The Arnold log is pretty important, at least for me, so here’s how to get it.

First, when you submit the job, set the log verbosity in rrSubmitter. You can do that in the Override section, but note that the verbosity levels in the Verbose list don’t match up with the newer MtoA verbosity levels. To get a Debug log, you’ll have to set the Verbose to Progress.
rrSubmitter_w_spotlight

rrSubmitter_Override

You can view the log in rrControl:
rrControl_Log_Files

[kick] [ass] reading from stdin


Some customers have reported a problem using a render manager (Muster, Tractor, Deadline) to render jobs with kick, typically via a wrapper script. The problem is that kick tries to read from STDIN instead of loading the specified ASS file. In the log, you’d see this:

00:00:00     0MB         | [ass] reading from stdin ...

A workaround is to add the -nstdin flag (Ignore input from stdin) to the kick command line.

Rayswitching shadow rays


The ray_switch node lets you evaluate different shading trees for different ray types. In general, it’s used to provide a simpler shading tree for secondary rays, such as diffuse, glossy, or shadow rays. So when a camera ray hits the object, you can do one thing, but when a secondary ray hits the object, you can do another, simpler thing 🙂

For shadow rays, it’s not the color that matters, but whether the object blocks the shadow ray from a light. For example, if an object is opaque, then it doesn’t matter whether ray_switch returns red or blue or green or yellow for the shadow rays: the object is still opaque and blocking the light. So, you could use a ray_switch.shadow to plug in a simple standard shader that provides just the opacity mask.

ray_switch_shadow_opacity

[SItoA] Disabling camera motion blur


Starting with version 2.8, SItoA no longer supports the Softimage motion blur property. Instead, you use the Arnold Parameters property to control transformation and deformation motion blur.
arnold_parameters_motion_blur

However, you cannot add an Arnold Parameters property to a camera (at least not using the SItoA custom menus, which will tell you that a camera is “is not a valid Object to add Arnold Parameters to”). Here’s a couple of ways to work around that:

  • Create an Arnold Parameters property on a polygon mesh, and then in the Explorer, drag that property to your Camera.
  • Select your camera and run this Python snippet:
    cam = Application.Selection(0)
    cam.AddCustomProperty( "Arnold_Parameters" )
    

Creating object mask AOVs that include opacity


  • Create a custom RGB AOV.
  • Use aiWriteColor to write the object mask to the custom AOV. The Input color of the aiWriteColor is the mask color, and you have to enable Blend to get the opacity blended into the Input.
    mask_opacity_aiWriteColor
  • Connect the Out Color of the aiWriteColor to the Color of a Standard shader. That sends the aiWriteColor beauty to the Standard.
    mask_opacity_Nodes
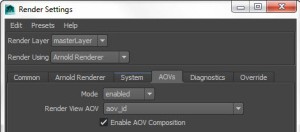
  • Make sure Enable AOV Composition is turned on in the Render Settings.
    EnableAOVComposition

I don’t think this set up works if you plug a Standard into the beauty of the aiWriteColor (eg Standard > aiWriteColor > Standard). With that set of connections, I could never get the opacity right in both the Beauty and the Mask AOVs.