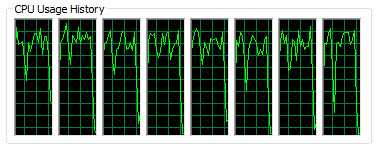
Rendering on a 4 Core Xeon CPU with HT
Rendering on a 4 Core Xeon CPU with HT

Want to know what shaders come with SItoA?
Use kick -nodes with the -l flag to get a list of all nodes. For example:
kick -nodes -l %SITOA_BINDIR%\sitoa_shaders.dll | find "shader"
where SITOA_BINDIR is just shorthand for the Application\bin\nt-x86-64 folder of your SItoA addon install. On my machine, that’s here:
C:\Users\SOLIDANGLE\Documents\Workgroups\sitoa-2.6.0-2013\Addons\SItoA\Application\bin\nt-x86-64
The output will list the builtin Arnold shaders first (such as ambient_occlusion, standard, and wireframe), and then the SItoA shaders (which start with the two BA_ shaders).
In general, you wouldn’t include a filename in the -l path. I included sitoa_shaders.dll so kick wouldn’t try to load sitoa_curves_proc.dll and then pop up a “sicppsdk.dll is missing” error because I’m not running kick in a Softimage command prompt (where all the Softimage environment variables are set for me).
So, a more general example would look like this:
kick -nodes t -l %SITOA_BINDIR%
-nodes t will sort the list of nodes by type.

I was tempted to title this post something like “why is my ass pink when I kick it???” 🙂
The color magenta (often reported as “pink” or even “purple” sometimes) is the color of missing shaders. If Arnold cannot find a shader, it returns the color magenta (RGB = 1, 0, 1). This is a pretty common result when people export an ASS file from Maya for the very first time. Unlike SItoA, which helpfully fills in the Shader Search Path for you, MtoA leaves the search paths empty (unless you fill them in yourself).
There’s several ways you can tell kick where to find the shaders:
kick -l C:\solidangle\mtoadeploy\2013\shaders
I thought you might also be able to use -set options.shader_searchpath on the kick command line, but that didn’t work for me.
kick -i "elephant.ass" -set options.shader_searchpath "C:\solidangle\mtoadeploy\2013\shaders"
In the comments, a reader asks:
I am trying to override AA_samples per geometry and cant figure out where to add the attribute. I tried adding a user option to a set with AA_samples 6 and numerous other things but to no avail. Any ideas??
That’s not the way Arnold rolls 🙂
Arnold currently uses a global, non-progressive AA scheme, and the official Arnold shaders (such as the Standard shader) don’t support per-shader or per-object sample settings. One of the goals of the Arnold renderer is to reduce the amount of controls, and per-object or per-shader sampling doesn’t really fit into that vision.
A possible workaround would be to write a custom shader that reads user data attributes from objects and overrides the sampling settings.
PS If you want to know what user options are available, try using kick -info. For example, kick -info polymesh will give you the available parameters for a polymesh node. And kick -nodes will give you a list of nodes.
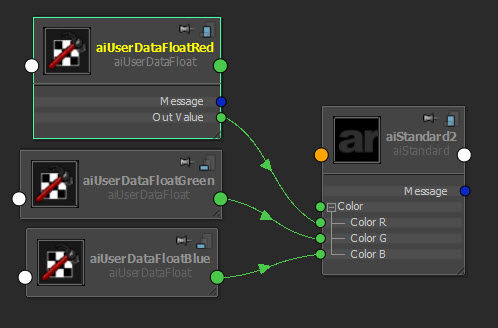
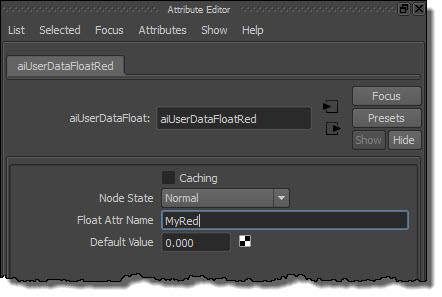
The aiUserData shaders, such as aiUserDataFloat, allow you to read user data from Maya nodes. So you can add user data to shape nodes and then use that user data in your shading networks.
Here’s the basic recipe:
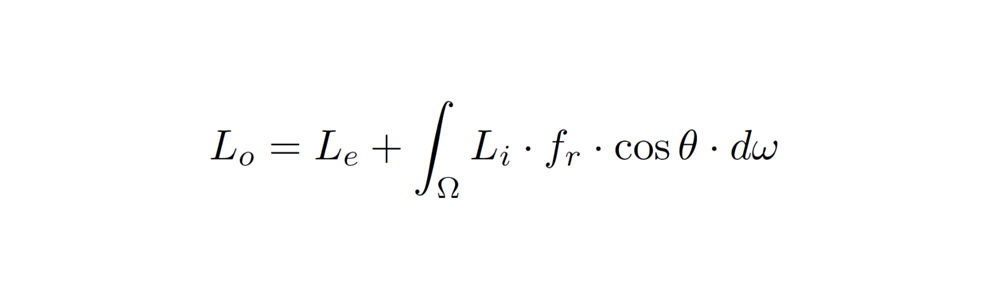
Here’s something I found while rummaging around my archives looking for a Softimage flashback. According to the Date Modified timestamp, this image was created in July 2000.

Update: I see that this image has already been posted elsewhere on the web.
In this blog post, I’ll quickly step through an example of how to use the <attr> token in the Maya File node.
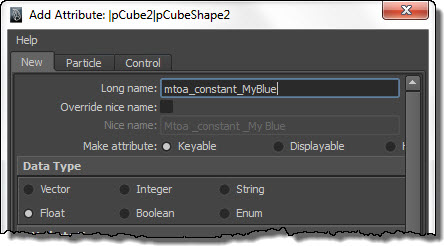
Add a "mtoa_constant_" attribute to the shape node.
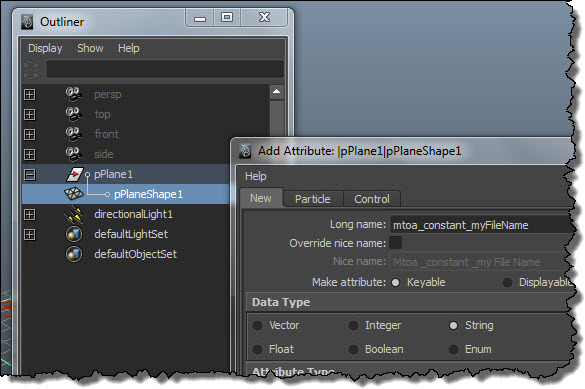
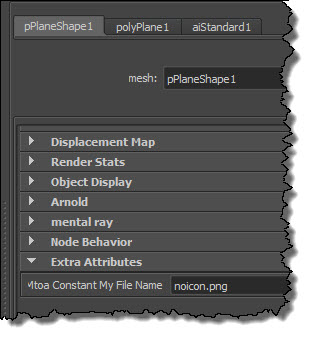
Put the name of the texture file in the extra attribute:
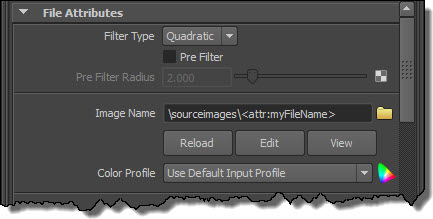
Use the token in the Image Name. Note that I have a relative path, so I have to make sure that I’ve set a project.
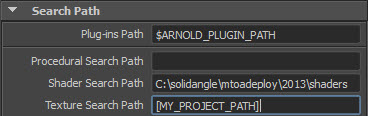
Now I’ve got something that will render in Maya. If I want to export this to an ASS file and render it with kick, I need to add a Texture Search Path (and optionally, a shader search path if I don’t want to use kick -l).
Here’s the texture-related parts of the exported ASS file:
options
{
 ...
 texture_searchpath "[MY_PROJECT_PATH]"
 ...
}

polymesh
{
 name pPlaneShape1
 ...
 declare myFileName constant STRING
 myFileName "noicon.png"
}

standard
{
 name aiStandard1
 Kd_color file1
}

MayaFile
{
 name file1
 filename "/sourceimages/<attr:myFileName>"
}
Notice how MtoA exported a relative path instead of an absolute. This happens only if you have a token in the filename; otherwise, you always get an absolute path.
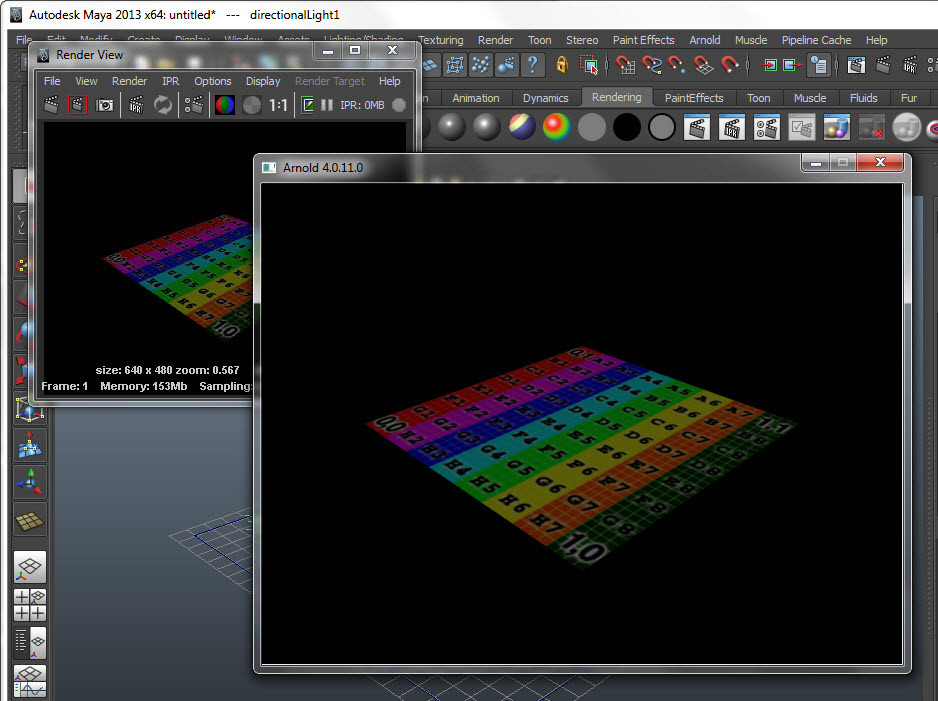
And here’s a screenshot to show all this working, both in Maya and in Arnold:
To use an environment variable in one of the Arnold search paths, you just have to put the environment variable in square brackets [ ].
For example, [ARNOLD_PLUGINS_PATH] or [MY_TEXTURE_PATH].
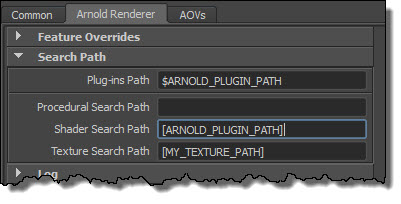
A search path can include many paths; just use a semi-colon (;) to separate each path. For example, here’s a search path that includes three different locations:
[ARNOLD_PLUGINS_PATH];[USERPROFILE]\Dev\shaders\bin\Release\x64;[MY_PLUGINS_PATH]
So, what’s this Preserve Layer Name setting do?

Preserve Layer Name is for single-layer EXRs, and it determines whether or not the AOV is written into the pre-defined R,G,B,A channels.
By that, I mean that if Preserve Layer Name = False, then a single-layer EXR will have these channels:
And if Preserve Layer Name = True, then the single-layer EXR will have channels like this (that include the “layer name”):
Channel names like “Arnold_Direct_Diffuse.R” can cause problems with some software, so by default Preserve Layer Names is set to False.
Note that Preseve Layer Names applies to single-layer EXRs only. If you’re writing out multi-layer EXRs, you’ll always get names like “Arnold_Direct_Diffuse.R”.
